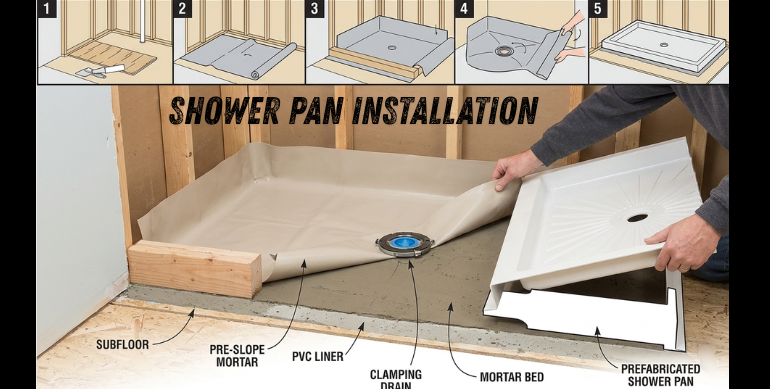
A properly installed shower pan is the foundation of any successful bathroom remodel or shower installation. Without a correctly fitted pan, leaks, water damage, and mold growth can quickly turn your dream bathroom into a costly repair nightmare. Shower pan installation is more than just placing a tray; it involves careful planning, precise measurements, proper slope creation, and high-quality materials to ensure water is directed toward the drain and away from walls and flooring.
This article provides a detailed, step-by-step guide to shower pan installation, including preparation, installation techniques, common mistakes to avoid, and long-term maintenance tips for a durable, leak-free shower. From selecting the right materials to ensuring proper drainage, each aspect is carefully covered to help you achieve professional results.
Additionally, the article will address troubleshooting tips for common installation challenges and provide insights into the best practices for maintaining your shower pan over time, ensuring it stands the test of wear and tear. By following this comprehensive guide, you can confidently undertake your installation project with clarity and ease.
| Step / Category | Key Actions | Purpose / Benefit |
| Subfloor Preparation | Clean debris, repair damage, and ensure a level surface | Provides a stable base and prevents uneven pan installation |
| Drain Assembly | Install drain flange, apply plumber’s putty or silicone, align with pan | Ensures proper drainage and prevents leaks |
| Shower Pan Placement | Place prefabricated or mortar pan, adjust slope toward drain | Directs water flow efficiently and prevents pooling |
| Waterproofing | Apply membrane or liquid coating, seal corners, and drain | Prevents water from leaking into the subfloor and walls |
| Tile Base Installation (Optional) | Install cement backer board, secure without penetrating waterproofing | Creates a stable surface for tiles and protects the waterproof layer |
| Sealing & Final Checks | Apply silicone at the edges, test the slope, and drainage | Confirms water flows to drain and prevents leaks |
| Air & Moisture Control | Use ventilation, dehumidifiers, or moisture-resistant insulation | Maintains dryness and prevents mold or mildew growth |
| Common Mistakes to Avoid | Improper slope, skipped waterproofing, wrong materials, misaligned drain | Reduces risk of leaks, water damage, and costly repairs |
| Maintenance Tips | Regular cleaning, inspect grout and sealants, and monitor for leaks | Ensures long-term performance and prevents damage |
| Pan Type Comparison | Prefab, tile, mortar, fiberglass | Helps choose the right material based on durability, cost, and bathroom needs |
Understanding the Importance of a Shower Pan
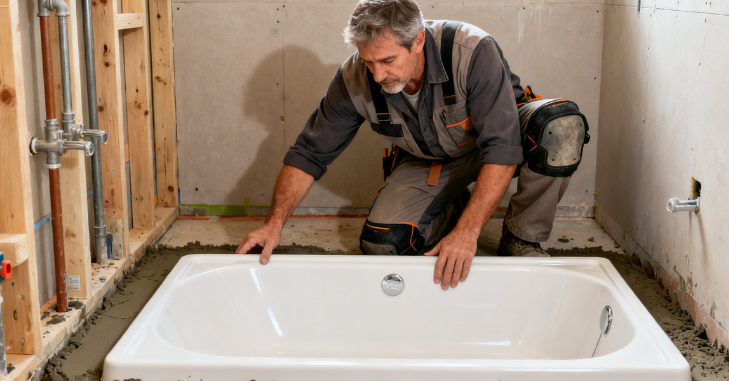
A shower pan serves as the waterproof barrier between your shower floor and the underlying subfloor. Its primary function is to collect water and guide it safely to the drain, preventing leaks that could damage floors, walls, and ceilings below.
Key Functions of a Shower Pan
- Directs water to the drain efficiently.
- Protects the subfloor and bathroom structure from water damage.
- Prevents mold and mildew growth in hidden areas.
- Provides a level and stable base for tiles or prefabricated shower bases.
Without proper installation, even high-quality materials cannot prevent water infiltration, highlighting the importance of following precise techniques.
Materials and Tools Needed
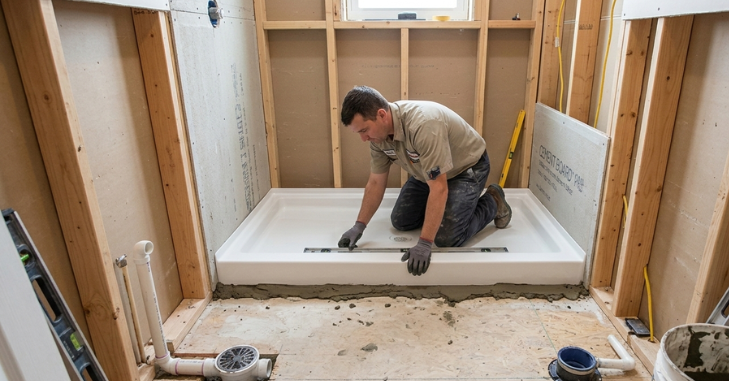
Before beginning the installation, gather all required materials and tools. This preparation ensures a smooth process and reduces the risk of mistakes.
Materials:
- Prefabricated shower pan or mortar bed for custom pans
- Waterproofing membrane (liner or liquid-applied)
- Drain assembly and flange
- Thin-set mortar or adhesive (for tile shower pans)
- Cement backer board or tile base
- Silicone sealant
Tools:
- Tape measure and level
- Utility knife
- Drill and screws
- Trowel
- Rubber mallet
- Mixing bucket for mortar
- Caulking gun
Step-by-Step Shower Pan Installation
Step 1: Preparing the Subfloor
The first step is to ensure the subfloor is level, clean, and structurally sound. Begin by removing old flooring or debris from the shower area. Check the subfloor for any damage or rot and repair it as needed. Use a level to confirm that the floor is flat; any unevenness can affect drainage and pan stability. If necessary, reinforce the subfloor with plywood or additional supports. Proper subfloor preparation is essential for a long-lasting shower pan and prevents future leaks or sagging.
Step 2: Installing the Drain Assembly
A correctly installed drain is critical for effective water flow. Fit the drain flange according to the manufacturer’s instructions, ensuring it is level and flush with the subfloor. To prevent leaks around the drain, apply plumber’s putty or silicone sealant. It’s also important to test the drain alignment before proceeding with pan installation, as a misaligned drain can lead to improper slope, pooling water, and costly repairs.
Step 3: Setting the Shower Pan
Depending on the type of pan—either prefabricated or custom mortar bed—the installation process differs slightly. For prefabricated shower pans, place the pan in position and ensure the drain aligns correctly. Apply thin-set or adhesive underneath for stability, and check for level, making minor adjustments as needed.
Step 4: Waterproofing
Waterproofing is critical to prevent leaks and extend your shower’s lifespan. Apply a waterproof membrane, whether a pre-formed liner or a liquid-applied coating, covering all areas of the pan and extending up the walls at least 6 inches. Be sure to seal corners and drain connection points carefully, and allow the waterproofing layer to dry or cure as directed by the manufacturer. Skipping or improperly applying waterproofing is one of the most common causes of leaks and mold growth.
Step 5: Installing the Tile Base (Optional)
For tiled showers, a cement backer board provides a stable surface for tiling. Cut the backer board to fit over the pan while maintaining the proper slope toward the drain. Secure the board with screws or fasteners, taking care not to penetrate the waterproof membrane. Apply thin-set mortar and tiles, starting at the drain and working outward to ensure an even, professional finish.
Step 6: Sealing and Final Checks
Finally, apply silicone sealant along the edges where the shower pan meets the walls. Inspect the slope to ensure water flows effectively toward the drain. To ensure everything is working as intended, test the drain by running water for several minutes and checking for leaks. Proper sealing and thorough testing are essential to ensure the shower pan performs as intended and to prevent future issues.
Common Mistakes to Avoid
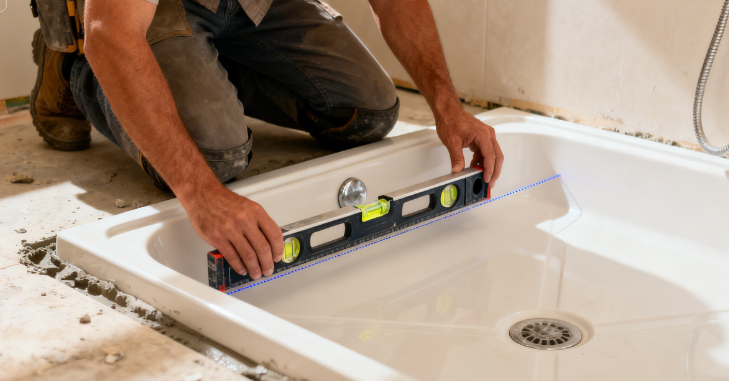
Even experienced DIYers and contractors can make mistakes during shower pan installation:
- Improper slope: Failing to create a slight incline toward the drain can lead to pooling water.
- Skipping waterproofing: Leaving the pan without a proper waterproof barrier increases the risk of leaks.
- Poor subfloor preparation: Uneven or weak subfloors can cause pan instability.
- Incorrect drain placement: Misalignment causes water to back up and pool.
- Using wrong materials: Low-quality membranes or adhesives may fail prematurely.
Maintenance Tips for Long-Lasting Performance
To keep your shower pan in top condition, it’s important to maintain it regularly. Start by cleaning the pan frequently to prevent soap scum and mineral buildup, which can affect both appearance and functionality. Additionally, inspect the grout, sealants, and joints periodically to ensure they remain intact and effective.
Be mindful to avoid dropping heavy objects on the pan, as this can lead to cracks and structural damage. Finally, monitor for early signs of leaks or discoloration and address any issues immediately to prevent more serious complications down the line. This proactive approach will help extend the life of your shower pan and maintain its overall effectiveness.
Comparison of Shower Pan Types

| Shower Pan Type | Pros | Cons | Best Use Case |
| Prefabricated (Acrylic/Plastic) | Quick installation, lightweight, low cost | Less customization, prone to scratches | DIY projects, small bathrooms |
| Tile Shower Pan | Fully customizable, aesthetic appeal, durable | Longer installation requires skill | Custom or high-end showers |
| Mortar Bed Pan | Strong, customizable slope, excellent drainage | Heavy, requires curing time | Large showers, commercial use |
| Fiberglass Shower Pan | Lightweight, pre-formed, affordable | Can crack over time, less durable than tile | Temporary or rental bathrooms |
Benefits of Professional Installation
Hiring a professional ensures:
- Accurate slope for drainage
- Proper waterproofing application
- Long-lasting installation without leaks
- Compliance with building codes
- Reduced risk of mold growth and water damage
Conclusion
Shower pan installation is a critical step in creating a functional, leak-free shower. From preparing the subfloor and installing the drain to waterproofing, tile application, and final sealing, every step must be performed with precision. Avoiding common mistakes and following best practices ensures your shower delivers long-lasting performance while protecting your home from water damage.
Whether using a prefabricated pan, tile base, or mortar bed, careful attention to slope, drainage, and waterproofing is key to a successful installation. By following this guide, homeowners and professionals alike can achieve a durable, aesthetically pleasing, and leak-free shower that will stand the test of time.
Apart from that, if you want to know more about The Ultimate Guide to Foundation Settlement Repair: Prevention Tips, Professional Methods, and Cost Breakdown then visit our New Construction Homes category.
FAQs
Tools: tape measure, level, trowel, drill, utility knife, mixing bucket.
Materials: shower pan, waterproof membrane, drain assembly, mortar or adhesive, backer board, silicone sealant.
Proper waterproofing, a correct slope toward the drain, sealed edges, and the use of quality materials are key steps to prevent leaks.
Yes, small prefabricated pans can be installed by skilled DIYers. However, professional installation is recommended for custom mortar beds or complex layouts to ensure proper slope, drainage, and waterproofing.
A shower pan is the waterproof base of a shower that directs water to the drain. It prevents water from leaking into the subfloor and causing structural damage, mold, or mildew.