Dealing with a broken zipper can be frustrating, especially when it affects your favorite jacket, bag, or pair of jeans. Many people immediately consider replacing the item, but in most cases, the problem can be fixed at home with a few simple tools and the right guidance.
If you’ve ever wondered how to repair a zipper, the good news is that common issues like stuck sliders, misaligned teeth, or loose stops can often be resolved quickly and affordably. By understanding how zippers function and following a structured repair process, you can extend the lifespan of your belongings and avoid unnecessary replacements.
| Section | Key Details | Why It’s Important |
| Understanding Zippers | Explains the components of a zipper: teeth, slider, tape, and stops. | Helps diagnose the exact problem before repairing. |
| Key Components | Teeth interlock, the slider moves, the tape holds the structure, and the stops prevent detachment. | Knowing each part improves repair accuracy. |
| Common Reasons Zippers Break | Misalignment, broken teeth, worn slider, fabric obstruction, and rust. | Identifies the root cause to choose the right fix. |
| Tools Required | Needle and thread, pliers, scissors, seam ripper, lubricant, replacement parts. | Ensures you’re prepared before starting repairs. |
| Step 1: Assess Damage | Examine teeth, slider, and alignment. | Prevents unnecessary repairs. |
| Step 2: Gather Tools | Organize all materials beforehand. | Makes the process efficient. |
| Step 3: Remove Slider | Carefully detach the broken or stuck slider. | Necessary if the slider is damaged. |
| Step 4: Fix or Replace Teeth | Remove broken teeth or sew a patch over gaps. | Restores zipper functionality. |
| Step 5: Repair/Replace Slider | Tighten with pliers or install a new slider. | Solves loose or slipping issues. |
| Step 6: Reattach Stops | Secure stops to prevent slider detachment. | Ensures durability. |
| Step 7: Test Zipper | Slide up and down to check smoothness. | Confirms repair success. |
| Step 8: Resew Zipper | Stitch the zipper back into the fabric securely. | Finalizes repair. |
| Preventive Maintenance | Clean teeth, apply lubricant, avoid force, and choose quality zippers. | Reduces future damage. |
| Conclusion | Repairing zippers saves money and extends the lifespan. | Encourages DIY maintenance skills. |
How To Repair a Zipper?

Repairing a zipper involves a few essential steps: first, assess the damage to determine whether the issue is the slider, the teeth, or the alignment. Gather the necessary tools: a needle and thread, pliers, and scissors. Remove the slider if it’s broken, and either repair or replace it.
If there are broken or misaligned teeth, you may need to replace them or sew a small patch over gaps. Once repairs are made, resew the zipper into the fabric, and ensure everything operates smoothly. By following these steps, you can effectively address common zipper problems and extend the life of your items, knowing exactly how to repair a zipper.
Understanding Zippers
Before diving into repairs, it’s essential to understand how zippers work. Zippers are made up of several key components, including the teeth, the slider, the tape, and the stops. Each component plays a vital role in the zipper’s functionality. Knowing these parts can help you troubleshoot issues effectively.
Key Components of a Zipper
- Teeth: The interlocking pieces that run along the length of the zipper.
- Slider: The mechanism that opens and closes the zipper. It moves up and down the teeth.
- Tape: The fabric that holds the teeth in place.
- Stops: These are found at both ends of the zipper to prevent the slider from completely detaching.
Understanding these components will help you diagnose problems and determine the necessary repair steps.
Common Reasons Why Zippers Break
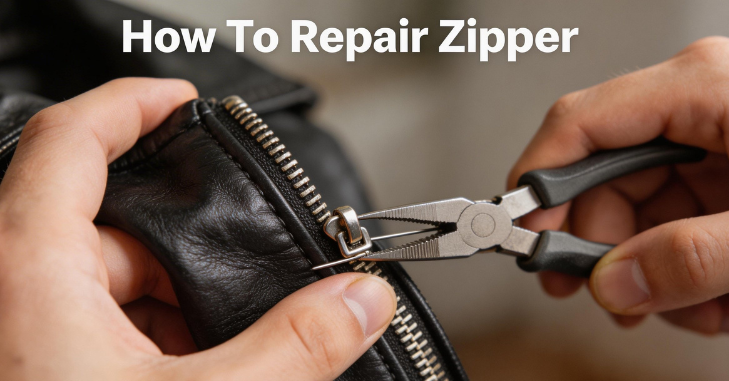
One of the most common issues with zippers is misalignment. This occurs when the teeth are not perfectly aligned, causing the slider to get stuck or not move at all. This can happen when pulling the zipper too hard or using it when the teeth are obstructed. Zipper teeth can chip, break, or bend.
This usually leads to sections of the zipper failing to interlock, making it impossible to fasten or unfasten. The slider can wear down or become damaged over time. If the slider is not gripping the teeth effectively, it may slide down without fully closing the zipper. Sometimes fabric can get caught in the zipper, leading to misalignment or damage.
This is particularly common with lower-quality zippers or garments made from thick materials. Zippers exposed to moisture can rust, particularly if they’re metal. This can make the slider difficult to move or cause other damage. Understanding these common issues can help you not only repair zippers effectively but also prevent future problems.
Tools You Need to Repair a Zipper
Having the right tools on hand can make the repair process easier and more effective. Here are the essential tools you might need:
- Needle and Thread: Choose a strong thread that matches the zipper fabric. A hand-sewing needle will work for most repairs, but a sewing machine can save time if you have one.
- Pliers: Use pliers to adjust sliders or remove broken teeth, if necessary.
- Scissors: Sharp scissors are essential for cutting thread, old zipper tape, or fabric if necessary.
- Seam Ripper: A seam ripper can help you remove stitches from the fabric surrounding the zipper if you need to extract a malfunctioning zipper.
- Replacement Parts: Having replacement sliders, teeth, or even an entire zipper can be handy if the repair requires component replacements.
- Lubricant: If your zipper is sticking, a lubricant such as beeswax, silicone spray, or zipper-specific lubricants can help it glide smoothly.
Step-by-Step Guide to Repairing a Zipper
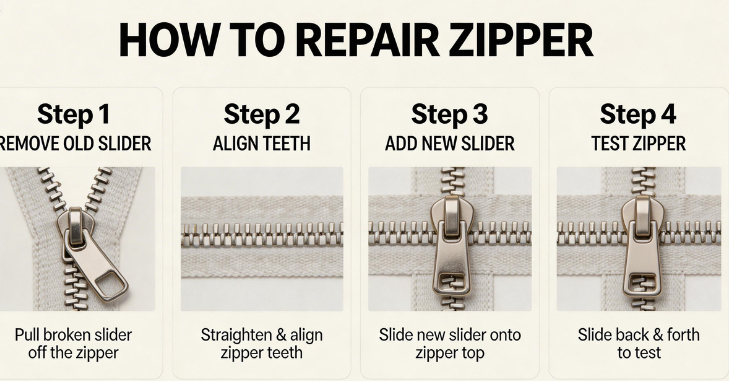
Step 1: Assess the Damage
Begin by examining the zipper carefully. Identify what part of the zipper is damaged—whether it’s the teeth, the slider, or something else. Understanding the extent of the damage will guide your repair approach.
Step 2: Gather Tools and Materials
Collect all the necessary tools mentioned earlier. Having everything at your disposal will make the process more efficient.
Step 3: Remove the Slider (if necessary)
If the slider is broken or needs to be replaced, use pliers to remove it carefully. If it’s stuck, gently wiggle it while pulling it downwards. Be cautious not to damage the teeth.
Step 4: Fix or Replace Teeth
If you discover broken or misaligned teeth, you may need to replace them. You can purchase replacement zipper teeth or use a needle and thread to sew a new section of tape in place.
- For broken teeth, you can remove them by carefully using pliers to pull them off. Then, sew a small piece of fabric or tape over the gap where the teeth were.
- For misalignment, manually adjust the teeth. If the alignment issues persist, consider replacing the zipper.
Step 5: Repair or Replace the Slider
If the slider is worn or damaged, you can either repair it or replace it.
- To repair: If the slider isn’t gripping, try tightening it with pliers. This sometimes helps the slider engage the teeth more effectively.
- Slide the new slider onto the zipper, ensuring it faces the correct direction (usually, the pull tab should be on top when it’s in the closed position).
Step 6: Reattach the Stops (if necessary)
If you’ve removed the stops to replace the slider, you’ll need to reinstall them. Use pliers to firmly attach the stops back onto the zipper tape at both ends.
Step 7: Test the Zipper
Before resewing the zipper into your garment, test it to make sure it operates smoothly. Move the slider up and down a few times to check for any issues.
Step 8: Resew the Zipper into the Fabric
Once you’re confident the zipper is working correctly, resew it onto the garment. Use a strong thread that matches the fabric, and sew through the fabric and the zipper tape securely.
Step 9: Final Adjustments
After securing the zipper, give it a final test. Ensure that it moves smoothly without catching. If there are any sticking points, apply a lubricant to help it glide better.
Preventive Maintenance for Zippers
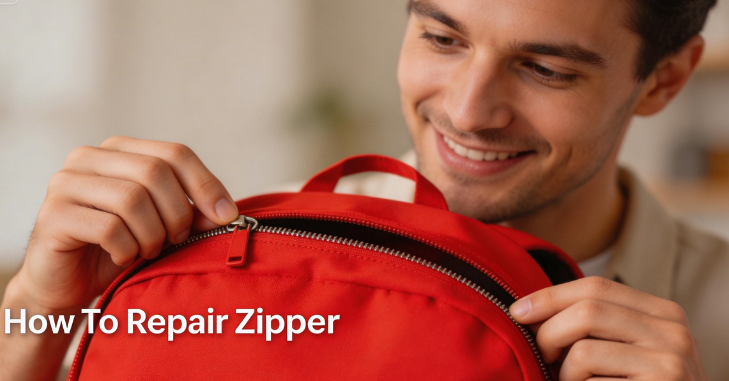
Keep zippers clean by removing dirt and lint from the teeth regularly. Use a soft brush or a toothbrush to maintain smooth operation. Periodically apply a lubricant to keep the slider gliding smoothly. This is especially important for metal zippers prone to corrosion.
Avoid forcing a stuck zipper. If the zipper doesn’t move smoothly, check for obstructions instead of pulling excessively, which can lead to further damage. When purchasing new items or repairing with new zippers, opt for high-quality zippers. They tend to be more durable and resilient against everyday wear and tear.
Professional Tailoring Solutions for Complex Zipper Repairs
In cases where a zipper is severely damaged, such as a completely detached track, broken fabric stitching, or a misaligned zipper sewn into delicate materials, professional tailoring becomes the most reliable solution. Experienced tailors use specialized tools and replacement components to ensure the zipper is restored in a way that maintains both durability and appearance.
They can also match zipper types, colors, and strengths according to the garment’s original design, preventing future issues. This is especially useful for expensive clothing items, jackets, or bags where DIY repairs might risk further damage. Seeking expert help ensures the zipper functions smoothly while preserving the overall quality and lifespan of the item.
Conclusion
Repairing a zipper may seem intimidating, but with the right tools and knowledge, it’s entirely manageable. By understanding the anatomy of a zipper, the common reasons for failure, and following a step-by-step repair guide, you can extend the life of your zippers and save money on replacements.
Regular maintenance and proper use can also go a long way toward preventing future issues. Whether you’re dealing with clothing, bags, or other fabric items, knowing how to repair a zipper is a valuable skill that can save you time and frustration.
Want to know about Best Oven Cleaner: Top-Rated Products, Expert Cleaning Tips, Step-by-Step Guides, Eco-Friendly Solutions & How to Remove Tough Grease, Stains, Burnt Residue & Built-Up Grime Quickly Check out our Quick Bites category.
FAQs
The best course of action is to replace the zipper pull if it is broken. You can use a safety pin, keyring, or paperclip as temporary replacements if you don’t want to use an actual pull. To secure the new pull to the zipper, slide it through the slider’s tab.
Zippers can be seamlessly replaced by a skilled tailor to make them appear brand new. To stop additional damage, strengthen the surrounding fabric. Align the color and style of the zipper with your clothing.
The most likely explanation is that the slide is no longer able to close the teeth because it is loose. Another possibility is that the teeth won’t latch together because they are out of alignment.
The part of a zipper that travels up and down the zipper track is called a zipper slider, sometimes referred to as a zipper pull. Even though replacing a zipper slider is typically far simpler than replacing the entire zipper, there are still a few things to consider before selecting the best option.